
Are you looking for cost-effective ways to start a hydroponic garden from scratch? You came to the right place if you’re wondering how to begin hydroponic farming at home!
In this simplified guide, we’ll dive deep into hydroponics and spill:
- 3 DIY-friendly tutorials on how to set up hydroponics at home
- the most profitable crops you can try growing in your garden
- and the truth about hydroponic’s profitability
Whether you’re a homesteader who wants to experiment and grow food for your family or plan to try this out to start a business, you’ll benefit from this guide. It will be an exciting journey so let’s get right into it.
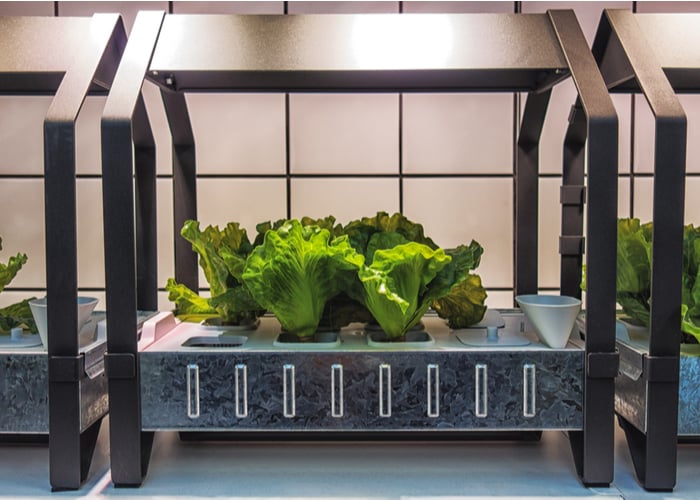
How to Start Hydroponic Farming at Home
Before setting up hydroponics, you need to decide first what crop you will grow.
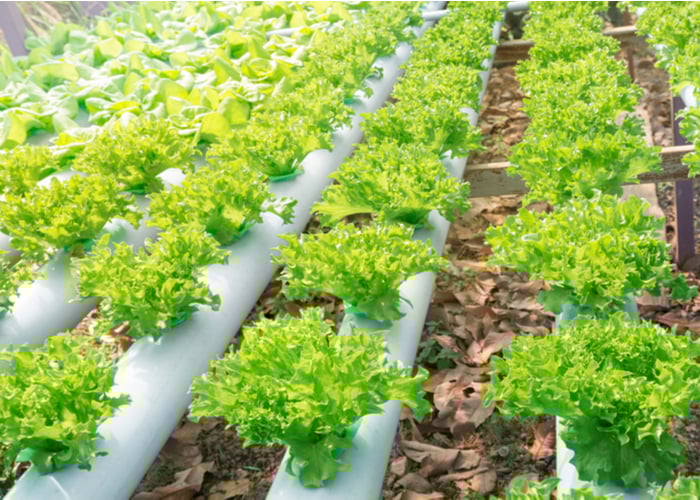
Leafy greens are the most cost-effective and most accessible to grow hydroponic plants. But in case you want to know what are the profitable crops, we compiled a list for you.
What is the Most Profitable Hydroponic Crop to Grow?
The most profitable crops to grow in your home includes the following:
1. Lettuce – $1-3 per pound
Leafy greens like lettuce are among the most profitable hydroponically grown plants because they have the lowest operational cost and are easy to grow.
Furthermore, 90% of Americans consume lettuce in a week. Iceberg lettuce can sell for around $1 per pound, but the Bibb variant, a gourmet restaurant item, costs more due to its crisp and delicious taste.
So, you have to choose the suitable variety if you want more profit and higher quality produce.
2. Microgreens – $20-$30 per pound
Microgreens are highly sought-after by chefs due to their unique taste and high nutrient content.
It’s more profitable because it only takes two weeks to grow and harvest, and they don’t need high-intensity lighting. They can sell for $20 to $30 per pound, so it’s an excellent choice.
3. Herbs
Hydroponically grown herbs are also profitable and low maintenance. The herbs below can sell for a reasonable price. They offer different aromas and flavors, but they’re all in demand in restaurants.
But among the herbs below, there’s a perennial plant that can grow very tall – the Bay leaves. It offers good profit, but the space in your home hydroponics needs to be considered.
- Basil – $14 per pound
- Cilantro – $6 per pound
- Dill – $14 per pound
- Mint- $14 per pound
- Chives – $14 per pound
- Tarragon – $16 per pound
- Bay Leaves – $30 per pound
4. Ginseng – $500-$600 per pound
This rooty crap that looks similar to ginger is a staple ingredient in many teas and energy drinks.
It does very well in hydroponics and can bring you good profit. However, it takes six years to harvest mature roots.
5. Cannabis – $1,600 per pound
This plant should top the list of the most hydroponically grown plant because it brings tons of money to the people who grow it.
However, it would help if you considered the local laws because not all states allow people to grow cannabis.
If you have already decided on what plant to grow, we’ll now introduce three hydroponic options for you.

3 DIY-Friendly Hydroponic Systems You Can Try At Home
There’s a wide variety of hydroponic systems you can choose from.
But today, we’ll focus on three DIY-able systems even for those who are not so handy but determined to build homemade hydroponic systems.
Here’s how to build a hydroponic system using a wick, deep water culture, and an ebb and flow system.
1. Wick System
If you’re planning to grow microgreens, herbs, and peppers, this system is the most suitable and one of the easiest to set up.
So, what do you need to start hydroponic farming?
- Bucket or basin for water reservoir
- Grow light (optional)
- Hydroponic fertilizer (dry or liquid)
- Cotton or nylon cord
- Growing medium
- Seedling
- Growing tray
- Water
- Drill or screwdriver
How do you start a hydroponic garden at home using a wick system?
Here’s a step-by-step guide on setting up a wick system.
1. Prepare the reservoir
Start by setting up a reservoir similar to other systems. It can be a large container with fertilized water. Place it below the grow tray.
The reservoir will supply water and nutrients to the plants and must be refreshed every week because the nutrients diminish as the crops absorb them.
2. Connect the reservoir and growing tray with wicks
Then, using a drill or screwdriver, create holes at the bottom of the growing tray and place two or more wicks through the holes to connect the reservoir and growing tray.
The wicks’ job is to deliver nutrients and water from the reservoir to the growing tray. You can use cotton rope as a wick, but it’s prone to mold buildup or rot.
So, it’d be better to use nylon rope because it doesn’t get molded or rotten.
Ensure the holes are smaller than the wicks to prevent any growing media from falling through the gaps.
But how many wicks should you use?
It’ll depend on the system size, plants used, wick material, and growing medium.
But the rule of thumb is to use one wick per plant and ensure that the wick’s tip is placed near the roots. However, water-hungry and large plants may need two wicks per plant.
3. Set up the growing tray
Now it’s time to set up the growing tray. You don’t need net pots to hold the growing medium in this system.
Instead, the growing medium will fill the whole tray with seedlings directly transplanted.
Avoid using a growing medium that will drain too fast. Instead, use something that will utilize the wick’s capillary action most effectively, such as vermiculite, perlite, and soilless mixes.
4. Install the light fixture
Lastly, install a light fixture above the growing tray. If you’re using incandescent light bulbs, fix them about 24 inches away from the plants.
But if you prefer LED and fluorescent lights, t should be 6 and 12 inches away from the crops because they’re not as hot as incandescent lights.
If you prefer natural light, you can skip this step.
2. Deep Water Culture
This system is ideal for lettuce, kale, basil parsley, chard, and bok choy. It’s not suitable for tomatoes and other heavy and tall plants because they need strong support to keep themselves upright.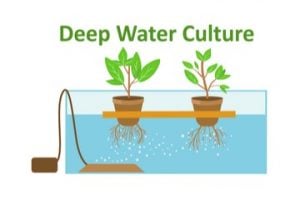
Here are the materials you need to set up a Deep Water Culture System at home.
- Drill tool
- Hole saw with arbor
- Pipettes
- Measuring beaker
- pH meter
- pH down
- Net pots
- Deep container or bucket with a lid
- Air pump with air stone
- Liquid nutrients for hard water
How to start hydroponic farming at home using deep water culture:
1. Get a deep storage container. It must be deep enough to make the nutrient more stable. There’s a high risk of fluctuations in shallow and small reservoirs’ nutrient concentration and pH and the need for a regular top-up.
2. Then, using a hole saw, drill a hole into the container’s lid where the net pots will sit. It’s best to keep the holes 15cm apart so that your plants can have more room to grow.
3. Set up the air pump outside the reservoir. It must come with a check valve so you can see to it that the pump doesn’t suck the water back up when it’s turned off. If it’s not available, kindly make sure the pump is always above the water level.
4. Now, it’s time to fill the container with water, leaving just about one to two cm space at the top.
5. Then, add the nutrients to the water, following the direction and the right formula in the bottle.
6. Next is to adjust the water’s pH level using the pH meter. The ideal pH level for most veggies and herbs is 5.5 to 6.5.
So, if you’re using tap water and it’s slightly higher, it’s better to add drops of phosphoric acid which are usually sold as pH down for hydroponics using a pipette.
7. This time, plug in the air pump, put the air stone in your DIY-ed reservoir, and secure the lid.
8. Finally, put the plants into the net pots and place them into the holes securely.
And that’s it! Your DIY deep water culture hydroponics at home is ready to operate.
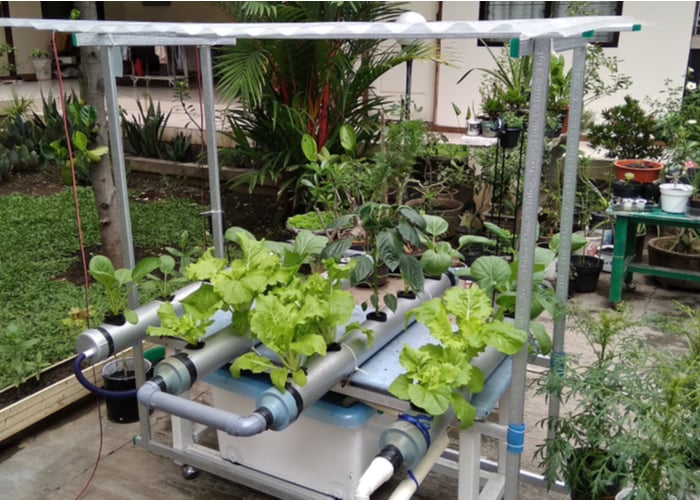
3. Ebb and Flow System
This system can be a little complex in design and may need more expertise in using the tools, but it’s still doable for beginners.
It’s also known as a flood and drain system because it works by flooding the growing medium with a nutrient-rich solution and draining it back into the reservoir.
The Ebb and flow system is ideal for tomatoes and beans because you can attach the trellis directly to the plant tray’s stand.
Here are the materials and tools needed:
- Submersible pump
- Electronic timer
- Bucket or basin for water reservoir
- Fill tube and drain tube
- Water
- Nutrient or fertilizer (either dry or liquid)
- Growing tray
- Stand for growing tray
- Seedlings in net pots
- Grow light (optional)
How to start hydroponic farming at home using an ebb and flow system:
1. Prepare the reservoir
Put the reservoir below the flood tray’s stand with nutrient-rich water. You can use the same recycled water for about one week at a time and then renew the nutrients as you change the water.
2. Put the fill tube and drain tube into place
The next step is to connect the reservoir to the tray using a fill tube connected to the submersible pump with a timer and a drain tube that will pull the water back into the reservoir.
This way, you can reuse the water in the system.
3. Connect the pump and timer
This time, connect the submersible pump and the timer to control the length and frequency of watering according to your plant’s needs.
4. Put up the flood tray
Plant your seedlings in perforated pots filled with a growing medium like perlite in advance, so you’ll just set it up.
The pots need to be twice as deep as the flood tray so the water can flow through the pot’s bottom to the plant’s roots.
5. Fix the lighting fixture
Like the wick system, you can skip this step if you’re using natural light. The distance between the crops and light must be 24 inches if you’re utilizing incandescent light bulbs.
But if you’re using LED and fluorescent lights, the distance should be 6 and 12 inches, respectively.
Since there will be constant water movement in this system, thorough scrubbing, cleaning, and sterilization are crucial after each growing season.
It’s the best way to prevent mold buildup and insect infestation.
How Much Profitable is Hydroponic Farming?
The hydroponic farming system needs a bigger investment, but it’s very profitable because farmland with the size of an acre can yield an estimated amount of $200,000 to $250,000 each year.
On the other hand, traditional farming can give you between $20,000 and $30,000 from the same land size.
This is because you can plant in hydroponics all year round no matter what’s the weather outside, and it allows you to stack multiple crops on top of each other, thus maximizing the space.
How Much Does It Cost to Start a Hydroponic Farm?
For some growers, a minimum start-up can be $2000 or more. The average one can range up to $20,000. On the other hand, the top start-up could spend up to $30,000 or more.
That’s why other people call it a cost-effective type of farming.
However, it’s just an estimated cost. Your initial investment always depends on what system and materials you will use.

How much does it cost to set up hydroponics at home?
For beginners who don’t have experience but want to try hydroponics at home, it’s a good choice, especially if you’re living in an urban area.
But, you might feel that it’s costly for you to start planting hydroponics. Some hydroponic growers say that you can spend $50 or more at home.
Good thing that there were many DIY that you could do to save on your expenses.
How much land is required for hydroponics?
According to United Nations Food and Agriculture Organization, hydroponics systems can be as small as one square meter.
But the, most households simplified hydroponic gardens are approximately 10 to 20 square meters.
Hydroponic gardens with 200 square meters are large enough and viable to sell excess produce for income.

Common Questions About Starting Hydroponic Farming
Can you set up hydroponics at home?
It’s absolutely possible to set up hydroponics at home by yourself if you know the basics, what the plant needs, and skills in using tools.
Deepwater culture systems, wick, and ebb and flow systems are some of the easiest to set up for beginners.
How do you start a hydroponic garden at home?
Setting up a hydroponic farm or garden at home doesn’t have to be expensive. There are hydroponic kits available online, but you can save more if you DIY them.
You just have to decide what plant to grow and what system works best for it.
Is hydroponic gardening expensive?
Hydroponic gardening can be expensive because it requires a system setup. For most farm growers, the higher the expenses, the larger the income.
However, you can save more if you’d take the DIY route. In most urban places, doing hydroponics for growing plants is more convenient and most accessible.
Does hydroponics need sunlight?
All plants, even hydroponics, require light to do photosynthesis. But, it’s not that necessary that the light is from sunlight.
For outdoor hydroponic growers, a greenhouse is needed for the plants to get enough but not too much heat from the sun.
On the other hand, indoor growers use artificial lighting to produce heat. It can be a LED, Fluorescent, incandescent, or HID bulb.
How much does it cost to build a hydroponic farm?
Building a hydroponic farm is most costly at first but a good source of income. In some cases, a hydroponic farm can cost $50 up to $10,000 or even a hundred thousand dollars, depending on the size, area, and system.
For example, in a small area system, you can spend between $50 to $500. You can pay at least several hundred dollars in a medium area system, while the large one can cost more.
What fertilizer do I need for hydroponics?
The best hydroponic fertilizer should contain NPK or Nitrogen, Phosphorus, and Potassium mix.
Aside from that, it should have Calcium, Magnesium, Sulfur, and any other micronutrients like Boron, Zinc, Manganese, Iron, Copper, Molybdenum, and chlorine.
This year, the most recommended fertilizers are General Hydroponics, Fow Farm Liquid Nutrient, Advanced Nutrients, and the MasterBlend.
Is hydroponic cheaper than soil?
Hydroponic growing is costlier in a start-up than soil because of the materials or machinery in a large field.
However, it has higher and faster yields and is pest-free if adequately maintained.
Hydroponic is very convenient and cheaper in urban areas with limited yard space because it’s easier to buy equipment like water and air pumps than soil.
Is hydroponics easy to maintain?
Maintaining hydroponics even at home is very easy, especially using the Deep Water Culture System.
Another good thing about this type of farming is that you don’t need to find proper soil for your plants, and there are no worries for weeds and insects; it consumes less water and grows faster than in soil.
How often do you need to change hydroponic water?
Though hydroponic farming saves more water, it is essential to change the water regularly.
It would be best to change the water after you topped it off to fill up fully. For some small water containers, you can change them in a short time interval.
But for the average size, you should change it every two to three weeks.
Does rain affect hydroponics?
A little rain is not destructive to your outdoor hydroponic plants. However, if it gets heavy, it can weaken and change the ph of your nutrient solution.
So, it would help if you always prepared for bad weather in your area by controlling the rain in your greenhouse to avoid failures of crops.
Are LED lights good for hydroponics?
LED lights are beneficial for indoor hydroponic plants as they have become a go-to hobby for some growers. It is the best choice for alternative light to help the plants photosynthesize.
Aside from that, it is more efficient; you can choose colors and light longer.
Does hydroponics need electricity?
The direct answer is yes. The bigger the area and the more pump and machines used, the more electricity consumed. On the contrary, fewer and lesser machine means lesser energy needs.
So, you can save electricity if you’ll choose outdoor hydroponics over indoors.
Hydroponic Farming at Home Final Thoughts
So, that’s it! We hope you’ve learned some tips and tricks on how to start hydroponic farming at home.
The wick, ebb and flow, and deep water culture systems are the most beginner-friendly DIY hydroponics to set up, and you don’t need to be an expert to start your own.
And the good news is it won’t be costly if you’d source some of the materials at your home.
But if you’re not handy or green-thumbed and you’d rather purchase a ready-to-use hydroponic system, check out the article below.

