If you’ve ever wanted to incubate chicken eggs at home and hatch your own chicks, you’re in for an egg-citing adventure!
Learning how to incubate chicken eggs is a fun and educational experience, and it’s not too hard.
The best thing is that you can do it at home! Some would even do it with their kids.
In other scenarios, incubating chicken eggs is a great science project for kids at school or at home.
Whether you want to grow your own flock or just watch chicks hatch, here’s everything you need to know to get started.
Incubate Chicken Eggs: What It Means
Incubating chicken eggs means helping them develop into chicks by keeping them warm and turning them regularly.
Normally, a hen does this by sitting on the eggs, but with an incubator, you can do it yourself!
There are three very important factors to consider when incubating chicken eggs, especially at home:
Warmth
The eggs need a steady temperature to grow properly.
Turning
Eggs have to be turned often so the chick develops evenly inside.
Humidity
Moisture is important to keep the egg from drying out.
By learning how to incubate chicken eggs, you get to be the “mother hen” and help the chicks grow.
Why Do People Incubate Chicken Eggs at Home?
People use incubators for many reasons:
More Control
You can pick which eggs to hatch, like choosing breeds or selecting healthy eggs.
Better Safety
Eggs in an incubator are safe from predators and bad weather.
Learning Opportunity
It’s a great science project that teaches biology and responsibility.
Larger Flock
A hen can only cover so many eggs at once, but an incubator can handle more at a time.
Learning how to incubate chicken eggs can be both fun and practical for any chicken owner!
What You Need Before Incubating Chicken Eggs
Before you incubate chicken eggs at home, gather these supplies:
- An incubator: Automatic or manual (we’ll talk about that later).
- Fertilized chicken eggs: Make sure they come from a rooster’s flock, not the grocery store!
- Thermometer and hygrometer: To check the temperature and humidity levels inside the incubator.
- Safe Location: A quiet, draft-free place to put your incubator.
- Chick starter feed: Better be ready with your stock before they start hatching!
- Patience and excitement: Hatching chicks takes about 21 days.
Tip: Always clean your incubator before using it to prevent bacteria from harming the eggs.
Choosing the Right Incubator
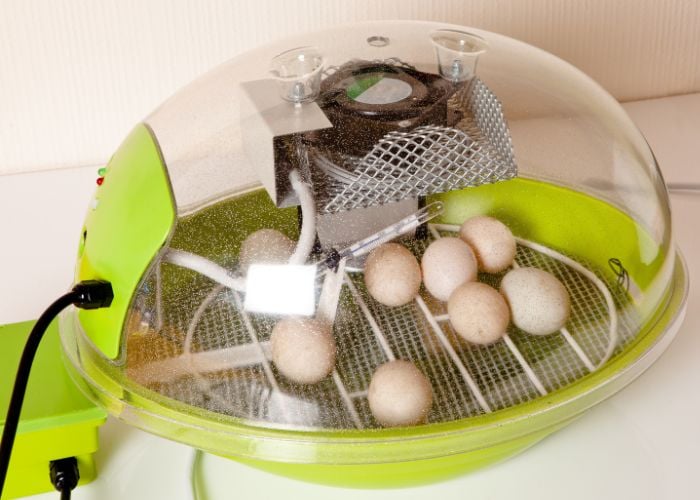
But first, what is an incubator?
It’s an enclosed structure (either made of steel, wood, or even glass) that keeps the chicken eggs warm with a heater and fan for a certain period.
Picking the right incubator makes learning how to incubate chicken eggs much easier. Here’s what to look for:
Temperature Control
The incubator should let you set and keep a steady temperature (usually 99.5°F).
Humidity Control
A way to add water and monitor humidity, so the eggs don’t dry out or get too damp.
Egg Turner
Some incubators turn the eggs automatically (this is highly recommended for beginners)
Manual turners are cheaper, but you’ll need to turn the eggs by hand several times a day.
Bonus Tip: We recommend choosing automatic incubators, especially for first-timers. They help you worry less and make the process easier.
How to Incubate Chicken Eggs at Home: Step-by-Step
Learning how to incubate chicken eggs step-by-step helps you get the best hatch rate.
Step 1: Get the Right Eggs
Make sure the eggs are fertilized. You can find them in hatcheries or poultry farms.
And before you ask, store-bought eggs from the grocery store won’t hatch.
Avoid using cracked, misshapen, or very dirty eggs.
To ensure high-quality, fertile eggs and reduce disease risk, you can also get them from a National Poultry Improvement Plan (NPIP)-certified flock.
Keep the eggs at room temperature before placing them in the incubator.
Note: You can store fertilized eggs in a cool room at 55 to 60 degrees Fahrenheit. And no, you cannot put them in the fridge. It’s too cold!
Step 2: Set Up the Incubator
It’s very important to ensure your incubator is clean before using it.
To remove germs, you can clean and disinfect the incubator.
Wash it with a 10% bleach solution or use hot water and soap. Rinse it off and let it air dry.
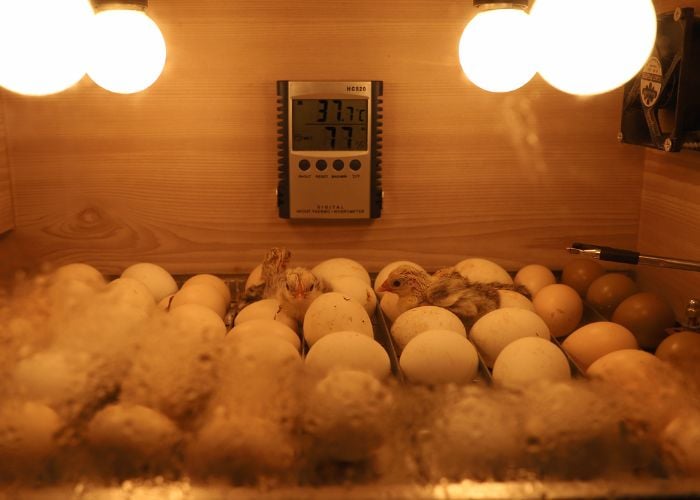
Once it’s all clean and dry, turn it on and set the temperature to 99.5°F (37.5°C).
Adjust the humidity to 50–55% for the first 18 days.
Let the incubator run for a few hours to stabilize before adding eggs.
Check out these guidelines as a reference:
Incubation Guidelines |
|
| Optimum temperature | 100.5 °F |
| Temperature range | 99-102°F |
| Relative humidity (day 1-17) | 50-55 percent |
| Relative humidity (day 18-21) | 70 percent |
When using the incubator, here are a few precautions and extra measures to keep in mind:
- Don’t let the temperature drop below 99°F
- If it reaches 102°F, don’t let it last more than a few hours.
- To double-check if the humidity is right, you can use a hygrometer.
- Don’t open the incubator until you need to. Otherwise, the changed temperature and humidity will affect the hatch.

Step 3: Place the Eggs (Day 1)
Place the eggs carefully with the pointed end down. It’s recommended that you set at least six eggs at a time.
If you place fewer eggs, you might end up with one or no hatchlings at all.
Also, remember to leave enough space between eggs for air circulation.
Close the incubator and don’t open it too often, as this keeps the temperature stable.
Step 4: Turn the Eggs (Day 1-18)
Eggs must be turned at least 3 times daily (unless your incubator does it automatically).
If you have to turn the eggs manually, mark them with a pencil. Don’t use a pen!
If you have an automatic incubator, you are free from all the tedious work.
Just make sure to check the user manual to avoid missing any instructions.
And even if you have an automatic incubator, make it a habit to check on your eggs daily.
Make sure they’re turning as they should. This prevents the chick from sticking to the shell and helps it develop evenly.
Why Do You Need to Turn The Eggs?
Simply put, you do it so the developing chick does not stick to the shell.
Scientifically, the yolk inside the eggs tends to float upward if it’s not turned.
When this happens, the embryo gets squeezed between the yolk and the shell.
This damages the embryo. However, if you keep turning the eggs, the embryo stays on top and safe.
Step 5: Always Check Temperature and Humidity
Use your thermometer and hygrometer to check daily.
Keep temperature steady at 99.5°F and maintain humidity around 50–55% for the first 18 days.
Note: Humidity is super important! Too dry and the chick might get stuck; too wet and the chick might drown.
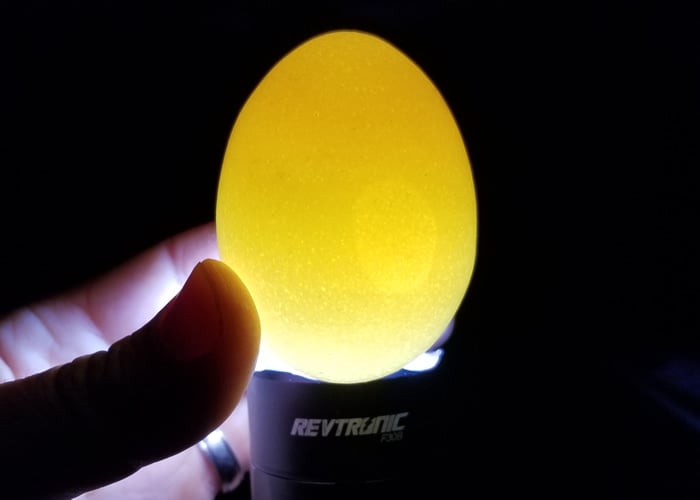
Step 6: Candling the Eggs (Days 7-10)
In the middle of the incubation process, you can start candling the eggs to check if the embryos are growing properly.
The simplest way to do this is to use a flashlight and shine the light through the eggs.
Don’t put the eggs out of the incubator for more than 5 to 10 minutes.
And you don’t need to candle them all at once. Just take a few to candle at a time and try another batch the next day.
What To Look For When Candling Eggs?
Check out these egg descriptions, what they mean, and what you can do with the eggs:
Egg Inside is Clear
This means that the egg is infertile, or the embryo died in the early incubation stage, or even before incubation.
What to do: Remove this egg from the incubator.
A Ring of Red is Visible
It’s a sign that there was an embryo, but it died.
What to do: Remove this egg from the incubator.
Blood Vessels Inside the Egg
Good news! This means that there’s a live embryo inside. You can usually see the blood vessels of a chick at 7 to 10 days in the incubation process.
By day 18, the embryo grows big enough to take up the entire egg and appears dark when it’s candled.
In some cases, you can even see movement inside the egg.
Step 7: Pre-hatching (Days 18-21)
On day 18, the embryo had already turned into a chick. At this time, you can stop turning the eggs.
Just make sure that the pointed end is face down while the larger end is facing up.
As for temperature, maintain it at 100.5 °F but increase the humidity to 70%.
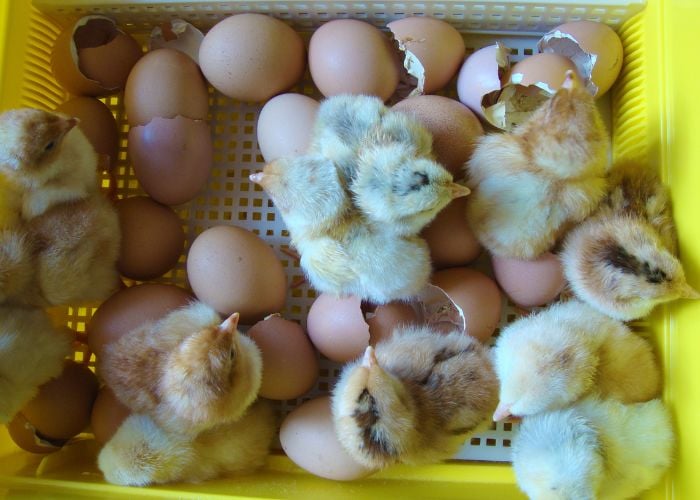
Step 8: Let the Chick Hatch on Its Own at Day 21
It’s the big day! On day 21, you’ll see chicks hatching on their own.
A chick takes 5 to 7 hours to hatch, but some can take up to 24 hours to fully hatch.
Once all the chicks have hatched, you can set the temperature down to 95 °F.
You can then transfer them to the brooder at 90-95°F, with food and water ready.
Note: Don’t help with the hatching process. Some blood vessels of the chick may still be attached to the shell. If you peel them off, you might cause bleeding and even death to the new chicks.
If the chicks haven’t hatched yet on day 21, give them time.
You can candle the eggs to see if there’s any movement.
Fertilized eggs that have been cooled before incubation may hatch a little later than usual.
How Long Does It Take for Eggs to Hatch?
Hatching takes about 21 days. Here’s the timeline:
| Incubation Timeline | |
| Days 1–18 | Keep temperature at 99.5°F and humidity at 50–55% |
| Day 18 | Stop turning the eggs. |
| Days 19–21 | Increase humidity to 65–70% to help the chicks hatch. |
| Day 21 | Get ready for chicks to break out of their shells! |
Tip: Don’t open the incubator during the last few days unless you need to add water to maintain humidity.
Common Problems When You Incubate Chicken Eggs at Home
Sometimes things don’t go as planned, even when you know how to incubate chicken eggs:
Temperature Too High or Low
It can kill the embryo or cause deformities.
Humidity Too High or Low
If it’s too dry, chicks can stick to the shell. If it’s too wet, chicks can drown.
Not Turning Eggs
The chick might get stuck in one position.
Solution: Check the incubator at least twice a day to avoid these problems.

What Happens on Hatch Day?
It’s the most egg-citing part!
On day 21, you might hear peeping or see small cracks. The chick uses its egg tooth to break the shell.
The process can take hours, so be patient.
Don’t help the chick unless you’re sure it’s in trouble. Most chicks hatch on their own.
Tip: Leave the chick in the incubator until it dries and fluffs up.
After the Chick Hatches
Once the chick is dry:
- Move it to a warm brooder (around 95°F).
- Give it chick starter feed and clean water.
- Keep it safe from drafts and predators.
This is where the real fun begins. That is, watching them grow!
ALSO READ: What Do You Need For Baby Chicks? How To Prepare
Benefits of Learning How to Incubate Chicken Eggs
Hatching chicks at home is more than just fun:
- Life Lessons: Teaches responsibility and patience.
- Educational: Great for science projects or 4-H.
- Build Your Flock: You get to raise your own chickens from day one.
- Family Bonding: Kids love watching chicks hatch.
Learning how to incubate chicken eggs is a rewarding experience for the whole family.
What to Do if Eggs Don’t Hatch at Day 21?
Sometimes, even if you’ve done everything right, eggs might not hatch exactly on Day 21.
Don’t panic! Here’s what to do:
Wait a Little Longer
Some chicks hatch late, maybe on Day 22 or even Day 23.
Give them an extra day or two to see if they pip (start to break the shell).
Check the Temperature and Humidity
Make sure the incubator is still at 100.5°F.
Humidity should be high enough (65–70%) to help chicks hatch.
Candle the Eggs
Gently shine a flashlight into the egg to see if there’s any movement.
If you don’t see movement or hear peeping, the chick may not have survived.
ALSO READ: The Complete Beginner’s Guide To Egg Candling
Don’t Rush to Help
Sometimes chicks just need more time.
Only assist if you’re sure the chick is stuck and can’t get out, but do it carefully!
Being patient is a big part of how to incubate chicken eggs successfully. 🐣
Will I Get Hens or Roosters During Hatching?
This is a question a lot of kids and grown-ups ask!
When you hatch eggs at home, you’re going to get a mix of hens and roosters.
And you can’t really choose which ones.
About half will be hens and half will be roosters, just like flipping a coin.
There’s no way to tell by looking at the egg before hatching.
Some people say things like “pointy eggs mean roosters” or “round eggs mean hens.”
But that’s just an old farm story—it’s not true!
If you get roosters, you must decide if you want to keep them.
Roosters can be noisy and sometimes bossy, so think about where they’ll live.
Learning how to incubate chicken eggs means being ready for both hens and roosters!
Incubate Chicken Eggs at Home: Before You Go…
Learning how to incubate chicken eggs is an egg-stra special adventure.
With the right tools and a little patience, you can watch new life begin right in your home.
Remember to keep the temperature and humidity steady, turn the eggs regularly, and wait patiently for hatch day.
Once your chicks arrive, you’ll feel proud that you hatched them yourself.
Now that you know how to incubate chicken eggs, you’re ready to start your own chick-hatching adventur!
Good luck!