Quail are quickly gaining popularity due to their rising fame on social media.
A quail has all of the benefits of a chicken, with very few downfalls, in a neat, easy-to-keep package.
Quail are quiet, small, good egg-layers and can be successfully kept indoors.
Aspiring urban homesteaders have fallen in love with these tiny birds, and it’s easy to see why.
If you’re wondering how to hatch and raise your own quail, read on because we’re covering all of that and more below.
Learn About Quail Keeping
As with any animal, it’s wise to do your due diligence and learn as much about them before bringing one (or many) home with you.
Quail are relatively easy to care for, with fewer requirements than chickens or pigeons.
They are social birds, so it is best to house them in a flock for companionship and mental stimulation.
As for their diet, quail need high-protein feed such as game bird starter or pellets made explicitly for quail. The Best Feed for Laying Quails.
Most importantly, their coop must provide at least one square foot of space per bird.
As far as height, you need to go very short or very tall.
These quirky little birds can jump to impressive heights.
They will be safe if you build the enclosure to be about eight feet tall.
They will also be safe if you build them to be twelve inches or shorter.
If you make it anywhere between thirteen inches to six or seven feet tall, that’s not high enough.
The odds are good that your goofy little quails will jump up, hit their heads on the ceiling, and seriously injure or kill themselves.
Quails jump when they are startled or excited; this is when they are most prone to snapping their necks at the ceiling.
The enclosure must be completely enclosed, too, because quails are not entirely domesticated. They can and will fly away if you give them a chance.
Other helpful reading material:
- How to Raise Quail as Pets
- The Best Quail Breeds for Kids
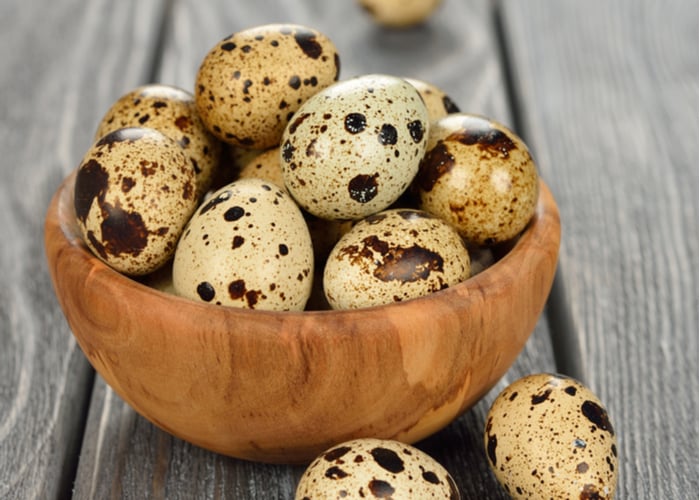
- Everything to Know About Quail Eggs
- What to Look For When Buying Quail
Choose and Find Quail Eggs to Hatch
Choose a Breed of Quail to Hatch
Some of the best quail breeds for raising include Coturnix quails, Bobwhite and Button quails, California Valley quails, Japanese quails, and Blue Scale quails.
- Coturnix quail are known for their fast growth rate and small size, which is ideal for space-strapped urban homesteaders.
- Bobwhite and Button quails have a mellow disposition that makes holding and handling easy. Bobwhites are the most common breed in the United States
- California Valley quails are breeders with reputations as reliable egg layers
- Japanese quails can lay up to 300 eggs annually, perfect for egg lovers.
- Blue Scale quails are beautiful, rare, and native from Kansas and Colorado to Central Mexico. They are good egg layers, too.
Read the Best Quail Breeds for Homesteading for a more in-depth look at each type.
Choose a Breeder for Your Quail Eggs
A good breeder has a strong reputation.
They also maintain a clean environment for their birds, are knowledgeable about quails and are willing to politely answer any questions or concerns you may have.
Research the breeder online or ask for insight into how they run their business and whether or not they take great care of their birds.
If possible, contact other quail owners who have purchased eggs from the same breeder.
This should be relatively easy if they have a strong online presence.
Confirm whether your breeder has the necessary certifications; these certifications guarantee that the operation is up to approved health and safety standards.
It’s also wise to ensure that any extra services offered by the breeder are explained in detail so it would be clear what comes with the price of your order.
If your breeder ships eggs or chicks through the mail, they should have a rock-solid method in which they are very confident. Above all else, the health and welfare of the egg or quail chick should be the number one priority.
If the breeder lives close by and won’t be shipping the eggs, visit their operation first to see how things are handled.
Not only does this let you see how they manage their flock, but it could give you several good ideas for setting up your own enclosure.
Don’t be too shy to ask questions about how they do things. Most quail owners are friendly and want to help more people successfully get into their hobby.
Set Up The Quail Habitat
Now that you’ve decided on a breed and a breeder, it’s time to get to work setting up a habitat for the quails.
It’s best to do this before ordering your chicks because incubation time flies by quickly.
You want to create your home without time constraints or stress, so it is the best you can make it.
Remember that quail need at least one square foot of space per bird horizontally.
Vertically, the enclosure should be twelve inches or shorter, or eight feet tall or taller, to make sure they don’t get hurt.
If your enclosure is between one and eight feet tall, stretch a soft net just below the hard ceiling.
This lowers your chances of them breaking their necks or suffering a head injury when they jump.
Use a lot of natural elements on the floor of the habitat to simulate their natural space. Quail live in dense grasslands or forest floors with ample hiding spaces.
Even though you probably want to sit and watch your new quail, they don’t want to be seen.
Use branches, evergreen boughs, dried grasses, hay, straw, and live plants.
Sand and wood shaving make great bases for the floor.
Cardboard boxes live, and artificial plants and shrub cuttings make great hiding places.
Add a box or tray of sand so they can dustbathe, plus small, simple nesting boxes for laying eggs.
Use a Broody Hen
After you’ve received your eggs, it’s time to start the incubation process.
If you’re lucky enough to have a hen who has gone broody, you can use her to hatch the eggs.
Be warned; you’ll need to be ready to catch the tiny little fellows once they hatch.
A bantam chicken is ideal than a standard hen, but both are viable options.
The incubation period is seventeen to eighteen days, much shorter than a chicken’s.
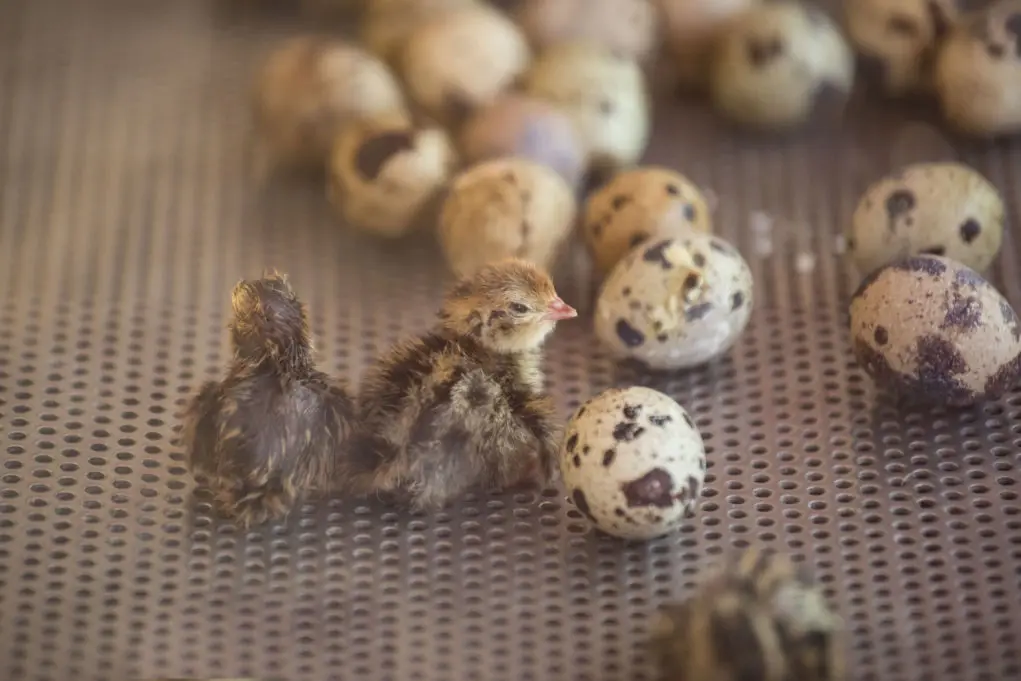
These tiny little ones are best described as clumsy bumblebees when they hatch.
No matter how often you hatch quail, you’ll never get over how impossibly tiny they are.
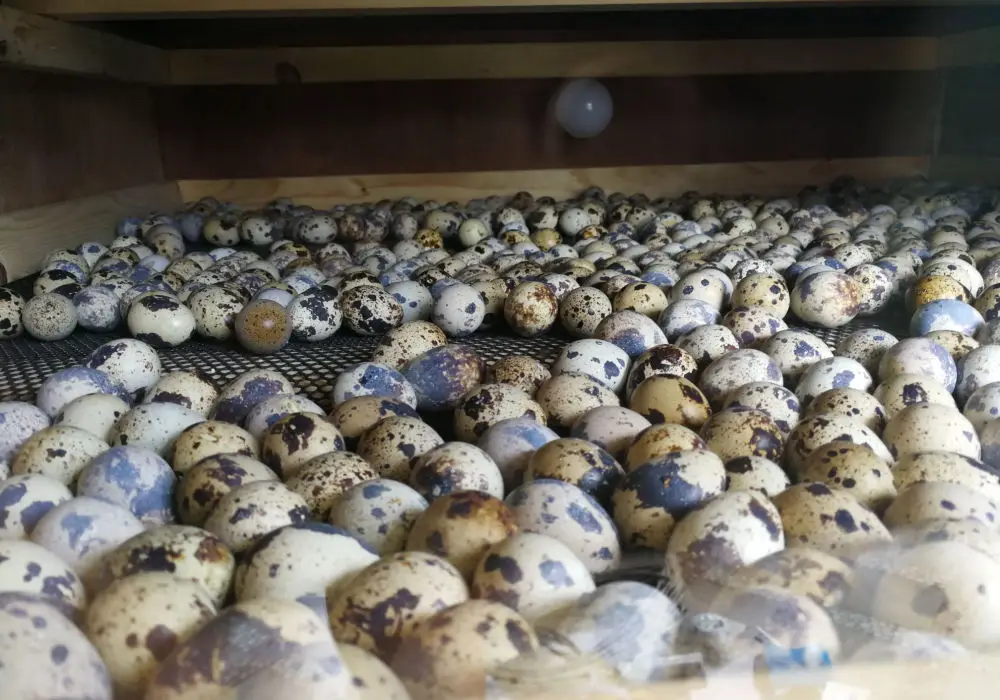
Use an Incubator
An incubator is usually the most accessible and safest option for quail egg incubation.
If possible, use a forced draught incubator. Still-air is the next best choice.
Forced Draught Incubator
Forced draught (fan-ventilated) incubators are the easiest to use.
For these, set them to 99.5 degrees Fahrenheit with a relative humidity of 60% and a wet bulb reading of 86 degrees Fahrenheit.
Turn eggs every two hours.
On day fourteen, candle and remove infertile, dead, or cracked eggs.
Move to a hatching tray; you no longer need to turn the eggs now.
This hatcher should be set to 99.5 degrees Fahrenheit and moved up to 70% humidity wet bulb at 90 degrees Fahrenheit.
Wait until all chicks have hatched on incubation’s seventeenth or eighteenth day.
Still-Air Incubator
For a still-air incubator, the humidity should be less than 70% wet bulb. You’ll need to change the temperatures on a near-weekly basis.
- Week one– set it to 101 degrees Fahrenheit
- Week two– set it to 102 degrees Fahrenheit
- Week three– between 102 to 103 degrees Fahrenheit, do not go over 103
- Week four- maintain 102 to 103 degrees Fahrenheit
Still, air incubators will usually not turn the eggs for you, so you should do this by hand, preferably five times a day.
However, three times daily is usually acceptable.
A light pencil mark will make it easy to determine which way you’ve turned the eggs.
Since still-air incubators aren’t perfectly uniform in temperature, consider moving the eggs to new locations in the incubator with every turn.
Around day sixteen, add a cheesecloth to the bottom of the hatching tray so it is easier for them to learn to stand.
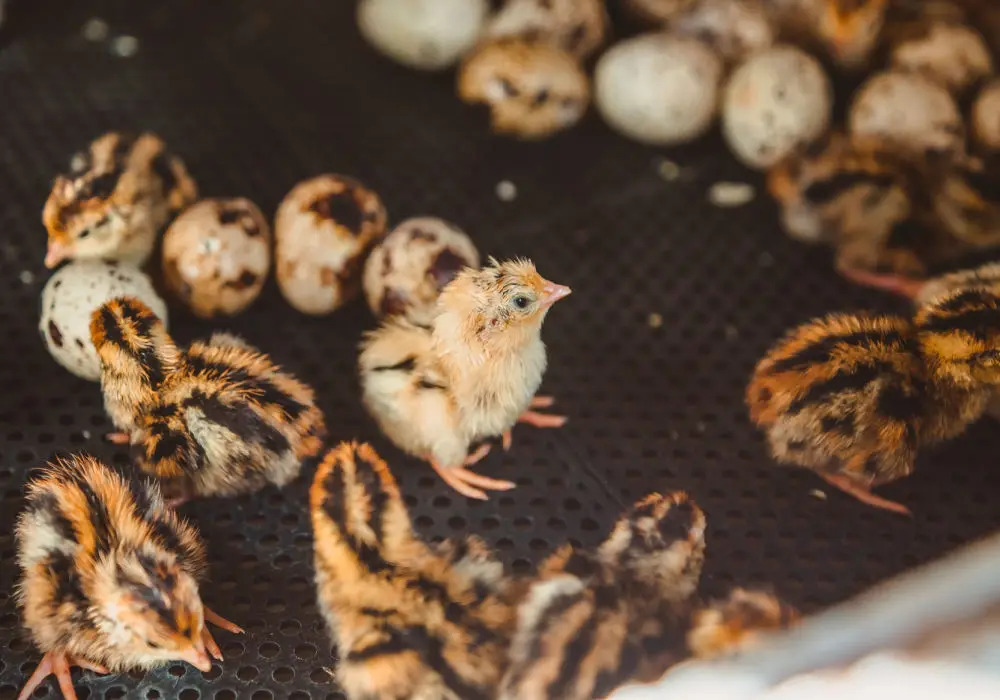
How to Care for a Hatching Quail
Hatching quail are preciously small in size and weight.
Do not help them peck their way out of the eggshell; this time is imperative for gaining leg strength so they can stand properly.
After all the quail have hatched, you can open the incubator and move them to their new home, a heated brooder.
Quail babies will need heat at least for the first four weeks of life, potentially longer, depending on your location and if they will be outside.
The first week you should provide them with a heat lamp that emits 95 degrees (Fahrenheit) of heat.
You should drop the temperature by a few degrees in the next few weeks after that.
You can do this by using a heater with a thermostat or slowly lifting the heat lamp further away from the brooder box with the chicks.
The second week can drop to 89 degrees Fahrenheit.
The third week can go down to 84 degrees Fahrenheit.
You can lower the temperature to 78 degrees Fahrenheit in the fourth week.
For week five, you can lower it to 73 degrees Fahrenheit.
In the following weeks, continue dropping the temperature by five degrees a week until it has acclimated to the weather outside if you’ll be keeping them outside.
If you will keep your quail indoors, drop it until it reaches room temperature.
Your baby quail will develop feathers around a month old that help regulate its body temperature.
You’ll know that the chicks are too cold if they tightly huddle under the center of the light.
If they are too hot, they will be far away from the heat lamp and may pant or spread their wings out.
The brooder is at the perfect temperature when the chicks are loosely clustered at the edges of the heat lamp’s circle.
A few may be directly beneath it, while others may be a few inches or even a few feet away.
How to Care for a Baby Quail
Drown-Proof the Water Supply
Use a narrow dish like a peanut butter jar lid to water the chicks.
For the first week of life, you may want to add gravel or small river stones so they won’t have a chance to drown themselves accidentally.
Clean this at least once a day.
If they are tossing a lot of litter or droppings into it, you may need to dump, rinse, and refill it five or more times a day.
Don’t Use Wire Bottom Cages
Wire bottom cages are hard on little feet and may encourage feather picking, fights, or cannibalism.
If your only option is wire, consider layering it with cardboard or several newspapers for stability and comfort. If using newspapers, layer at least three pages for the floor, if not more.
Make it Draft-Free
Cold drafts will kill quails quickly, even if they do have a heat source. Consider keeping them indoors if possible.
If not, place the brooder in a garage, on your porch, or in a barn.
Make sure the sides are solid, not wire, and as draft-free as possible.
Add a Lid or Screen Top After One Week
They will start jumping and flying at one week old, so cover the brooder to avoid escapees.
Not only can they get hurt when loose, but they probably won’t be able to find their way back in, causing them to freeze, starve, or become dehydrated.
How to Raise Quail
When the quail are six or seven weeks old, you can introduce them to your other quail.
If you have a territorial breed, like Japanese quails, put the “new” and “old” quail into an enclosure brand new to both groups to prevent fights.
If you want to raise quail for meat, they are ready for harvest at around eight weeks old. Females may start laying eggs at six weeks old.
Offer plenty of high-protein feed that is specially formulated for quail.
How To Hatch A Quail Egg: Final Thoughts
Armed with the knowledge of proper chick hatching and rearing, you’re ready to go.
Raising quail is a quick and immensely rewarding process that you’ll love. It will likely find easy to do, especially after rearing your first group.
Enjoy the process!